L’eau des poules en hiver peut geler alors que la mangeoire est pleine et que le poulailler semble bien protégé. Une mince pellicule de glace suffit parfois à rendre l’abreuvoir inutilisable. Le réservoir peut même contenir encore de l’eau liquide pendant que la coupelle ou les petits dispositifs de distribution sont bloqués.
Pour éviter cette mauvaise surprise, choisissez une méthode adaptée à votre hiver et au temps que vous pouvez consacrer aux vérifications. Sans électricité, il faut généralement remplacer l’eau et surveiller davantage. Avec une installation adaptée, un abreuvoir chauffant peut alléger la routine, mais il demande lui aussi des contrôles.
Voici comment organiser un point d’eau fiable pour des poules adultes, sans transformer le poulailler en pièce chauffée ni compter sur une astuce qui fonctionne seulement les jours de petit gel.
Eau des poules en hiver : vérifier là où elles boivent
Commencez par regarder la coupelle, le bord du récipient ou les tétines, ces petits embouts que la poule actionne pour boire. Vérifiez que l’eau arrive réellement jusqu’au bec. Un réservoir rempli ne prouve pas que le point de distribution fonctionne.
L’accès à l’eau reste indispensable pendant la saison froide. Un manque d’eau peut perturber l’alimentation et la ponte : le Manuel vétérinaire Merck rappelle les conséquences d’une privation d’eau chez les volailles. La neige ne constitue donc pas votre solution d’abreuvement.
Observez également les poules les plus discrètes. Peuvent-elles s’approcher sans être chassées ? Si un seul emplacement devient difficile d’accès, prévoyez un deuxième point d’eau et surveillez-le avec la même attention.
Eau des poules en hiver sans électricité
1. Choisir un emplacement facile à entretenir
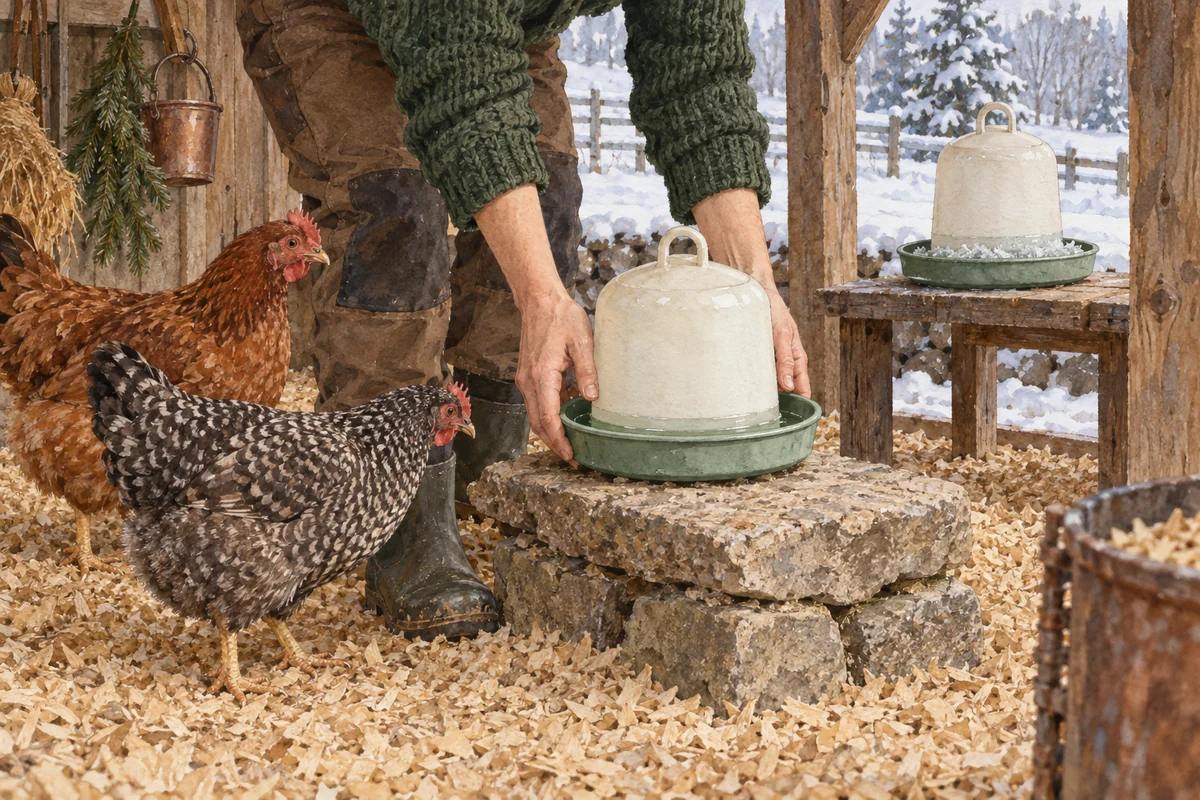
Installez l’abreuvoir dans un endroit couvert, protégé du vent et accessible aux poules. Posez-le sur un support bas et stable pour limiter les copeaux projetés dans l’eau, sans le placer trop haut pour les plus petites. Évitez un passage étroit où il serait renversé.
Un coin ensoleillé peut être intéressant en journée, mais vérifiez ce qui se passe quand le soleil disparaît. L’abri réduit certaines contraintes ; il ne suffit pas à empêcher le gel lorsque tout l’espace reste sous zéro.
2. Préparer deux abreuvoirs pour les échanger
Gardez un second abreuvoir propre, prêt à être rempli. Quand le premier gèle, remplacez-le aussitôt, puis faites-le dégeler dans un endroit approprié, hors de portée des poules. Nettoyez-le et vérifiez qu’il ne fuit pas avant de le remettre en service. L’Université du Minnesota recommande justement de prévoir un abreuvoir de rechange.
Si le plastique est pris dans la glace, ne forcez pas les pièces et ne frappez pas le réservoir. Un récipient fissuré peut ensuite vider son contenu dans la litière. De l’eau propre, à une température confortable, convient pour le remplacement ; l’eau bouillante n’a pas sa place dans l’abreuvoir.
3. Régler les passages d’après le gel observé
Lors des premiers froids, revenez après le remplissage pour voir à quel moment la glace commence à se former. Notez l’heure et les conditions. Si la coupelle gèle entre deux visites, raccourcissez l’intervalle ou changez de méthode.
Il n’existe pas de durée garantie sans chauffage. Le même matériel peut convenir pendant un gel léger et devenir insuffisant au cours d’une journée beaucoup plus froide. Si vous partez travailler, organisez les échanges avec une personne disponible plutôt que de laisser un abreuvoir gelé jusqu’au soir.
Quelle solution choisir selon votre situation ?
La durée du gel et votre disponibilité comptent autant que le matériel. Le tableau suivant sert de point de départ ; les vérifications sur place vous diront si votre choix suffit.
| Votre situation | Organisation possible | Limite à prévoir |
|---|---|---|
| Gel bref, présence à la maison | Point d’eau abrité et échanges entre deux abreuvoirs | Revenir avant que la coupelle ne regèle |
| Gel durable, sans électricité | Plusieurs échanges dans la journée et une personne disponible | Un passage matin et soir peut être insuffisant |
| Gel durable, alimentation électrique adaptée | Abreuvoir chauffant ou base compatible avec votre récipient | Vérifier le fonctionnement et prévoir une solution de secours |
| Absence pendant les heures où les poules sont actives | Système testé dans ces conditions, avec une personne pouvant intervenir | Éviter une organisation qui dépend d’échanges que personne ne fera |
Eau des poules en hiver avec un abreuvoir chauffant
Choisir un ensemble compatible
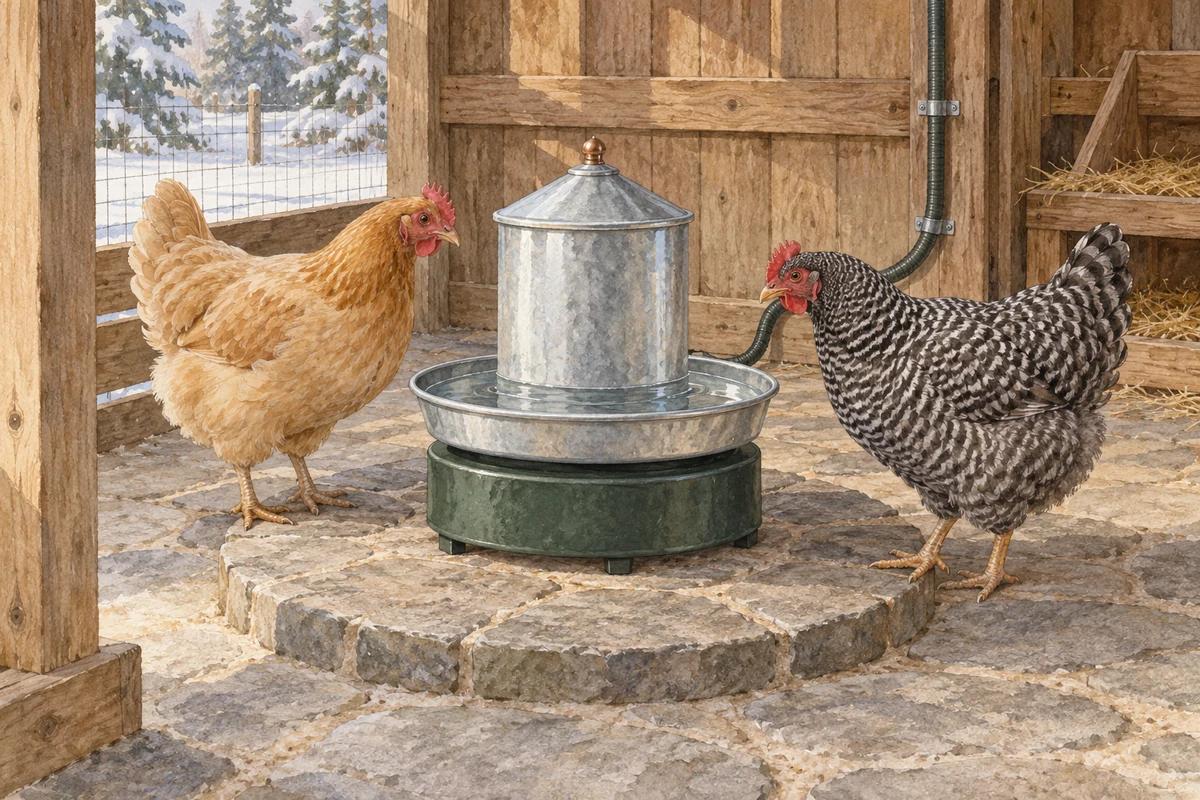
Vous pouvez utiliser un abreuvoir conçu avec son propre chauffage ou une base chauffante prévue pour un récipient compatible. Avant l’achat, vérifiez le matériau accepté, les conditions d’utilisation et les limites de température indiquées par le fabricant.
Ne supposez pas qu’une base convient à tous les modèles. Certaines sont destinées aux abreuvoirs métalliques et ne doivent pas recevoir un récipient plastique. Le fabricant Farm Innovators distingue notamment la fontaine chauffante complète de la base conçue pour un abreuvoir métallique à double paroi. Cet exemple rappelle pourquoi la notice de votre propre appareil doit guider le choix.
Préparer le support et le branchement
Respectez les instructions concernant la stabilité du support, les dégagements autour de l’appareil et la protection contre l’humidité. Gardez les branchements hors de l’eau et les câbles à l’abri des becs. Faites vérifier l’alimentation par un électricien si l’installation ne convient pas à cet usage ; une rallonge laissée dans la neige n’est pas une installation permanente.
Évitez les montages de fortune avec une ampoule, une bougie ou une résistance improvisée sous un récipient. Dans un abri où s’accumulent poussière et litière, choisissez du matériel conçu pour cet usage et utilisez-le selon sa notice.
Vérifier l’eau malgré le chauffage
Un appareil branché peut être vide, sale ou en panne. Regardez l’eau au point de distribution et assurez-vous qu’elle reste disponible. Pour les modèles à tétines, contrôlez aussi les embouts : chauffer le réservoir ne dispense pas de vérifier ce qui dépasse à l’extérieur.
Conservez l’abreuvoir de rechange même après l’achat d’un appareil chauffant. Il vous servira en cas de panne de courant, de nettoyage ou de fuite.
Les astuces qui ne remplacent pas une vraie surveillance
Une balle flottante, une bouteille placée dans le récipient ou un bac sombre au soleil ne garantissent pas une eau liquide pendant un gel durable. Demandez-vous surtout si les poules peuvent encore boire au moment où vous vous absentez. Une astuce utile pendant une courte gelée ne devient pas automatiquement une solution pour tout l’hiver.
N’ajoutez pas de sel à l’eau pour retarder le gel. Un excès de sodium peut être toxique pour les volailles, comme l’explique le Manuel vétérinaire Merck dans son chapitre sur les intoxications. N’utilisez pas non plus d’antigel. Gardez l’eau potable et cherchez la solution du côté du matériel, de l’emplacement et des passages de contrôle.
Ne versez pas simplement de l’eau neuve sur une coupelle pleine de glace ou de saletés. Remettez un point d’eau propre et utilisable, puis traitez l’abreuvoir gelé séparément.
Une routine simple pour garder l’eau disponible
Intégrez ces contrôles à votre routine du poulailler, puis ajoutez les visites nécessaires pendant les heures où les poules sont actives.
- À la sortie du matin : vérifier la coupelle ou les tétines, remplir ou remplacer l’abreuvoir et observer une poule boire.
- Pendant la journée : revenir selon la vitesse de gel constatée, retirer les saletés et vérifier que toutes les poules peuvent s’approcher.
- Avant la nuit : vérifier une dernière fois l’accès à l’eau pendant leur période d’activité et préparer l’abreuvoir propre du lendemain.
- Après une panne ou un changement de temps : contrôler immédiatement l’eau, même si votre système fonctionnait bien la veille.
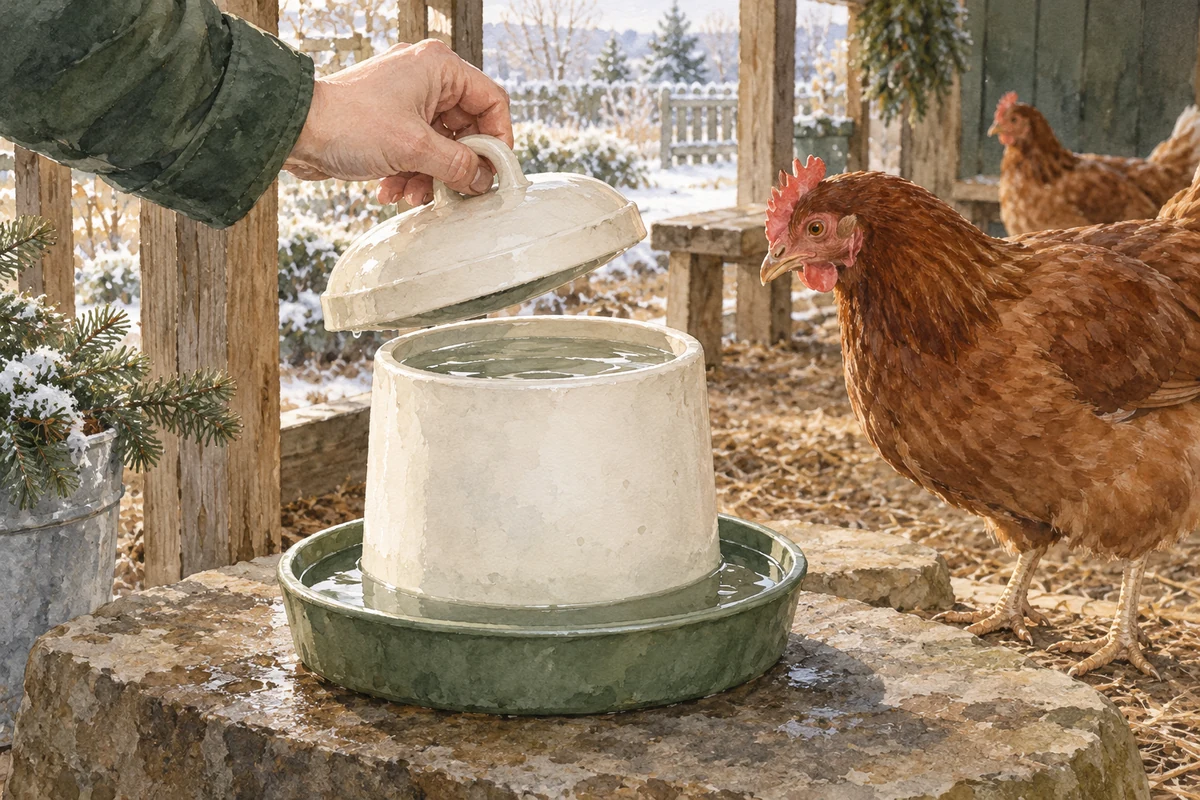
Retirez les zones de litière mouillées autour du point d’eau et recherchez l’origine des déversements. Un récipient trop haut, instable ou mal assemblé demande une correction. L’Université d’État de l’Oklahoma rappelle que la ventilation hivernale aide à évacuer l’humidité et à conserver une litière sèche. Ne fermez donc pas toutes les aérations pour tenter de sauver quelques degrés.
Si une poule ne boit toujours pas alors que l’eau est disponible, observez son état et les interactions du groupe. Une faiblesse importante ou un problème persistant mérite une aide vétérinaire ; ne forcez pas de l’eau dans son bec.
Préparer l’hiver avant le premier abreuvoir gelé
Préparez dès l’automne un emplacement abrité, un abreuvoir de rechange et une organisation qui tient compte de vos absences. Testez ensuite votre méthode pendant les premiers gels. Pour le toit, les perchoirs et la ventilation, retrouvez les 10 vérifications pour préparer le poulailler au froid.
Garder l’eau des poules en hiver disponible repose sur une règle simple : vérifier ce qu’elles peuvent réellement boire. Sans électricité, adaptez les échanges au gel observé. Avec un appareil chauffant, respectez sa notice et conservez vos passages de contrôle.
Chez vous, l’abreuvoir gèle-t-il surtout pendant la nuit ou aussi au cours de la journée ?
Sources et repères
- University of Minnesota Extension — Caring for chickens in cold weather : abreuvoir de rechange et précautions électriques.
- University of New Hampshire Extension — How Should I Take Care of Backyard Chickens in the Winter? : solutions d’abreuvement avec ou sans électricité.
- Oklahoma State University Extension — Backyard Flock Production : eau propre et maîtrise de l’humidité.
- Manuel vétérinaire Merck — Nutritional Requirements of Poultry : importance de l’eau pour les volailles.
- Manuel vétérinaire Merck — Poisonings in Poultry : risques liés à un excès de sodium.
- Farm Innovators — Heated Poultry Fountain : exemple de différences entre fontaine chauffante et base compatible. Consultez toujours la notice du modèle choisi.
Chicken water in winter can freeze even when the feeder is full and the coop seems well protected. A thin layer of ice may be enough to make a waterer unusable. The reservoir may still contain liquid water while the drinking rim or small dispensing parts are blocked.
To avoid that surprise, choose a method that suits your winter weather and the time you can spend checking the water. Without electricity, you will usually need more frequent water changes and visits. With a suitable electrical installation, a heated waterer can make the routine easier, but it still needs checking.
Here is how to set up a dependable water station for adult hens without turning the coop into a heated room or relying on a trick that only works during a light frost.
Chicken water in winter: check where the hens drink
Start with the drinking rim, the edge of the bowl or the nipples, the small fittings a hen activates to release water. Make sure water actually reaches the bird’s beak. A full reservoir does not prove that the drinking point is working.
Access to water remains essential in cold weather. A lack of water can affect feeding and egg production; the Merck Veterinary Manual describes the effects of water deprivation in poultry. Snow should therefore not be your watering plan.
Watch the quieter hens too. Can they reach the water without being chased away? If one station becomes difficult to access, provide a second drinking point and check it just as carefully.
Chicken water in winter without electricity
1. Choose a spot that is easy to maintain
Put the waterer in a covered spot protected from wind and accessible to the hens. Use a low, stable support to reduce bedding kicked into the water without making it too high for the smaller birds. Avoid a narrow passage where the waterer could be knocked over.
A sunny spot may help during the day, but check what happens when the sun disappears. Shelter reduces some of the difficulties; it cannot prevent freezing when the whole area remains below freezing.
2. Keep two waterers ready to swap
Have a second clean waterer ready to fill. When the first freezes, replace it promptly and let it thaw in a suitable place away from the hens. Clean it and check for leaks before putting it back into use. The University of Minnesota recommends keeping a spare waterer for freezing weather.
If plastic parts are trapped in ice, do not force them apart or strike the reservoir. A cracked container may later empty into the bedding. Use clean water at a comfortable temperature for the replacement; do not put boiling water in the waterer.
3. Time your visits around the freezing you observe
During the first cold spells, return after filling the waterer to see when ice starts forming. Note the time and conditions. If the drinking rim freezes between visits, shorten the interval or change your method.
There is no guaranteed ice-free period without heat. The same equipment may work during a light freeze and become inadequate on a much colder day. If you leave for work, arrange water changes with someone who is available rather than leaving a frozen waterer until evening.
Which method fits your situation?
How long freezing conditions last and how often you can visit matter as much as the equipment. Use this table as a starting point, then let your checks on site show whether your choice is working.
| Your situation | Possible arrangement | Limit to plan for |
|---|---|---|
| Brief freezes, someone at home | A sheltered water station and two waterers to rotate | Return before the drinking rim freezes again |
| Persistent freezing, no electricity | Several water changes during the day and someone available | Morning and evening visits may not be enough |
| Persistent freezing, suitable electrical supply | A heated waterer or a base compatible with your container | Check that it works and keep a backup ready |
| Away while the hens are active | A system tested in those conditions, with someone able to intervene | Avoid relying on water changes that nobody will make |
Chicken water in winter with a heated waterer
Choose compatible equipment
You can use a waterer with its own heating system or a heated base designed for a compatible container. Before buying, check the accepted container material, permitted operating conditions and temperature limits specified by the manufacturer.
Do not assume that one base fits every waterer. Some are intended for metal fountains and must not be used with a plastic container. Farm Innovators, for example, distinguishes its complete heated fountain from the base designed for a double-wall metal fountain. That example shows why the instructions for your own equipment must guide your choice.
Prepare the support and electrical connection
Follow the instructions for a stable support, clearance around the equipment and protection from moisture. Keep connections out of water and protect cords from pecking. Ask an electrician to check the supply if it is not suitable for this use; an extension cord left in the snow is not a permanent installation.
Avoid improvised arrangements with a light bulb, candle or makeshift heating element under a container. In a shelter where dust and bedding collect, use equipment designed for the purpose and follow its instructions.
Check the water even when the heater is on
A plugged-in waterer can still be empty, dirty or faulty. Look at the drinking point and make sure water remains available. With nipple waterers, check the fittings as well: heating the reservoir does not remove the need to inspect the parts exposed outside it.
Keep your spare waterer after buying heated equipment. It will be useful during a power outage, cleaning or a leak.
Tricks that do not replace regular checks
A floating ball, a bottle inside the container or a dark bowl in the sun does not guarantee liquid water during persistent freezing conditions. The practical question is whether the hens can still drink when you are away. A trick that helps during a brief frost does not automatically become a solution for the whole winter.
Do not add salt to the drinking water to delay freezing. Excess sodium can be toxic to poultry, as explained in the Merck Veterinary Manual chapter on poultry poisonings. Do not use antifreeze either. Keep the water safe to drink and solve the problem through equipment, placement and scheduled checks.
Do not simply pour fresh water onto a drinking rim full of ice or dirt. Restore a clean, usable drinking point, then deal with the frozen waterer separately.
A simple routine to keep drinking water available
Include these checks in your daily coop routine, then add visits as needed while the hens are active.
- When the hens come out in the morning: check the rim or nipples, refill or replace the waterer and watch a hen drink.
- During the day: return according to the freezing you have observed, remove dirt and check that every hen can approach.
- Before nightfall: check access once more while the hens are active and prepare a clean waterer for the next morning.
- After a power outage or weather change: check the water immediately, even if the system worked well the previous day.
Remove wet bedding around the water station and find the cause of spills. A container that is too high, unstable or incorrectly assembled needs attention. Oklahoma State University explains that winter ventilation helps remove moisture and keep bedding dry. Do not close every vent in an attempt to retain a little warmth.
If a hen still does not drink when water is available, observe her condition and the flock’s interactions. Severe weakness or a persistent problem calls for veterinary help; do not force water into her beak.
Prepare before the first frozen waterer
Set up a sheltered station, a spare waterer and a plan for your absences in autumn. Then test your method during the first freezes. For the roof, roosts and ventilation, see the 10 checks to prepare your chicken coop for cold weather.
Keeping chicken water in winter available comes down to checking what the hens can actually drink. Without electricity, adapt water changes to the freezing you observe. With heated equipment, follow its instructions and keep making your regular checks.
Does your waterer mainly freeze overnight, or does it also freeze during the day?
Sources and practical references
- University of Minnesota Extension — Caring for chickens in cold weather: spare waterers and electrical precautions.
- University of New Hampshire Extension — How Should I Take Care of Backyard Chickens in the Winter?: watering options with and without electricity.
- Oklahoma State University Extension — Backyard Flock Production: clean drinking water and moisture management.
- Merck Veterinary Manual — Nutritional Requirements of Poultry: the importance of water for poultry.
- Merck Veterinary Manual — Poisonings in Poultry: risks of excess sodium.
- Farm Innovators — Heated Poultry Fountain: an example of differences between a heated fountain and a compatible base. Always consult the instructions for your chosen model.
Continuer dans le même univers
Pourquoi mes poules se piquent-elles entre elles ? 8 causes et un plan d’action pour protéger la victime
Une poule est poursuivie ou perd ses plumes ? Distinguez la hiérarchie normale du picage dangereux et suivez un plan pratique pour protéger la…
Lire l’article
Poux rouges des poules : 7 signes et un plan maison pour assainir le poulailler
Sept signes pour reconnaître les poux rouges et un plan pratique à réaliser soi-même pour nettoyer, traiter et surveiller le poulailler.
Lire l’article
Protéger son poulailler des prédateurs : 9 vérifications avant la nuit
Neuf vérifications concrètes pour repérer les points faibles du poulailler, renforcer l’enclos et mettre les poules à l’abri avant la nuit.
Lire l’article