Votre nymphe passe devant un endroit prometteur, mais les truites ne réagissent pas. Puis, après un réglage, elle accroche le fond à chaque passage. Entre les deux, il existe une question plus utile que « Quelle autre mouche essayer? » : à quelle profondeur votre mouche évolue-t-elle réellement?
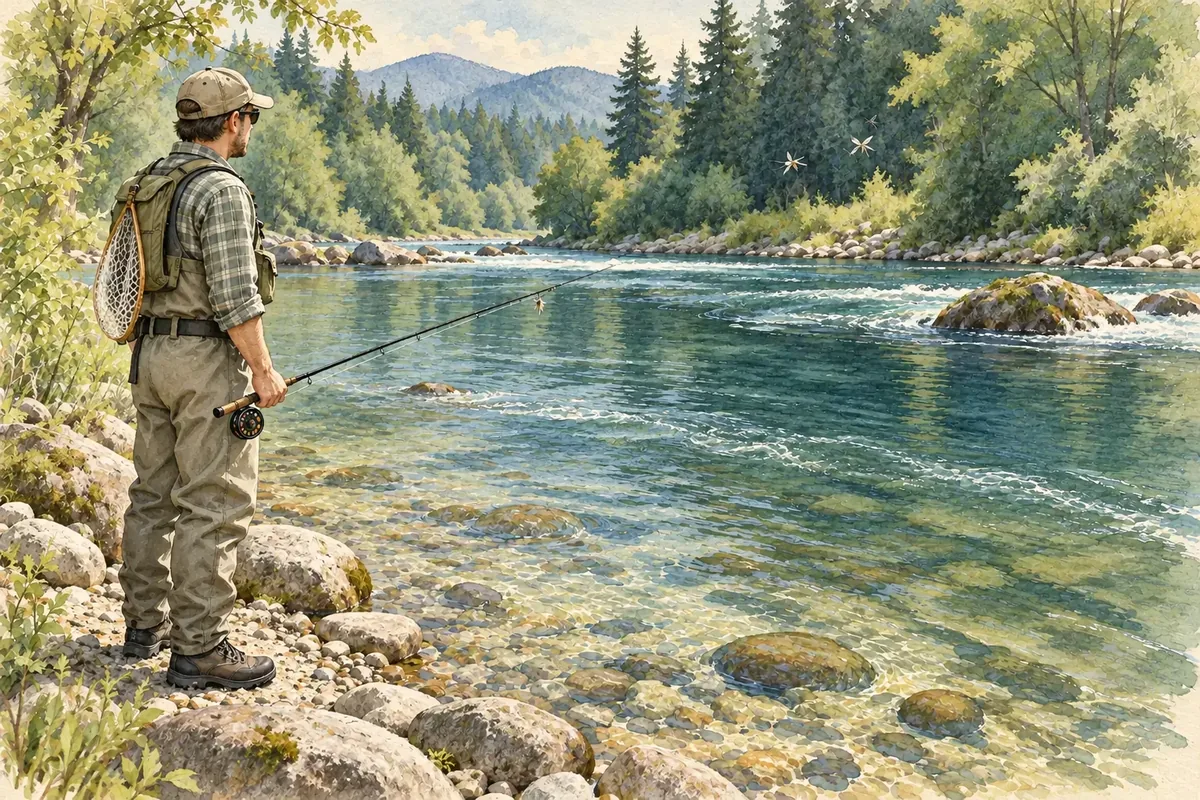
La nymphe est une mouche artificielle qui imite notamment un insecte aquatique encore immature, vivant sous l’eau. Elle peut sembler bien choisie et pourtant passer au-dessus du poisson. À l’inverse, un montage trop lourd peut rester coincé entre les pierres. Pour progresser, cherchez une profondeur adaptée au secteur, puis vérifiez votre hypothèse avec quelques passages comparables.
La bonne profondeur n’est pas toujours le fond
Une truite peut se nourrir près du fond, entre deux eaux ou juste sous la surface. La profondeur recherchée est celle de la nourriture et du poisson, pas automatiquement le point le plus bas. Si vous voyez des poissons bouger sous la surface, commencer très profond peut vous faire passer sous eux.
Lorsque rien n’est visible, un secteur accessible de profondeur modérée constitue un bon terrain d’essai. Repérez une bordure de courant ou une petite coulée, c’est-à-dire une zone où l’eau avance assez régulièrement. Pour choisir ce secteur, vous pouvez reprendre les repères pour lire l’eau et savoir où lancer. Ici, nous allons surtout travailler ce qui se passe sous la surface.
Commencer avec un montage que vous comprenez
Pour cet exercice en rivière, gardez une soie flottante, un bas de ligne adapté et une seule nymphe. Le bas de ligne est le fil qui relie la grosse soie à la mouche; sa partie terminale plus fine s’appelle la pointe. Une seule mouche simplifie l’observation et limite les emmêlements.
Ajoutez, si cette technique est autorisée, un indicateur de touche : un petit repère flottant fixé sur le fil. Vous surveillez ses déplacements pour remarquer un arrêt ou un changement de trajectoire. Il peut signaler qu’un poisson mord à la mouche, mais aussi un contact avec une pierre. Il ne vous montre pas directement la position de la nymphe.
Le poids utilisé pour faire descendre la mouche, parfois appelé lest, peut être une bille métallique intégrée à la nymphe ou un petit poids fixé sur le fil. Commencez avec une nymphe à bille d’un poids que votre canne lance confortablement. L’indicateur doit pouvoir soutenir le montage sans être constamment entraîné sous l’eau par son seul poids. Pour les raccords, consultez le guide du bas de ligne et des nœuds.
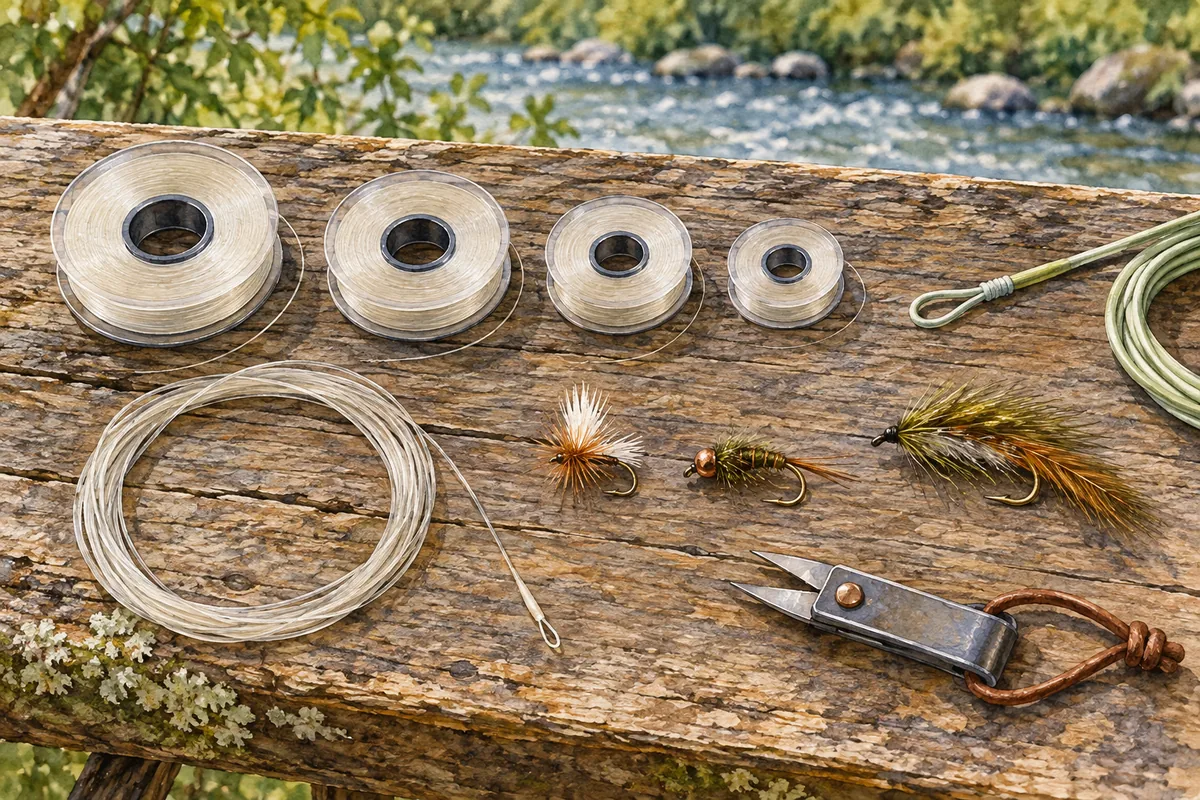
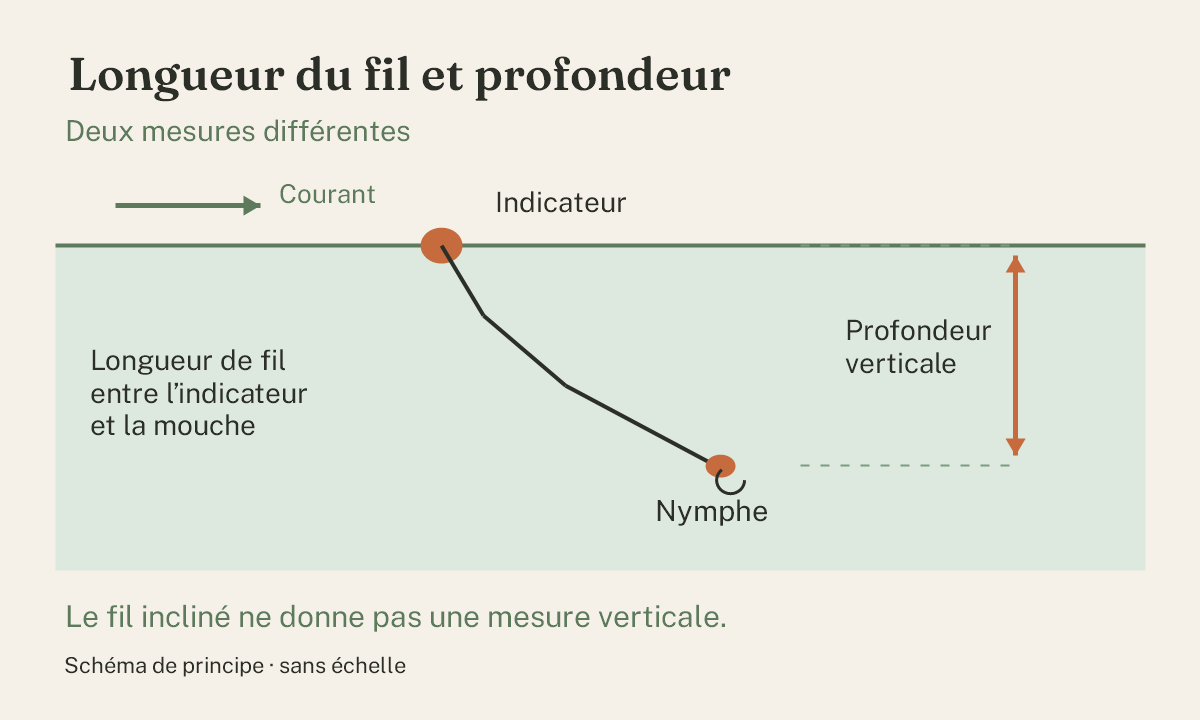
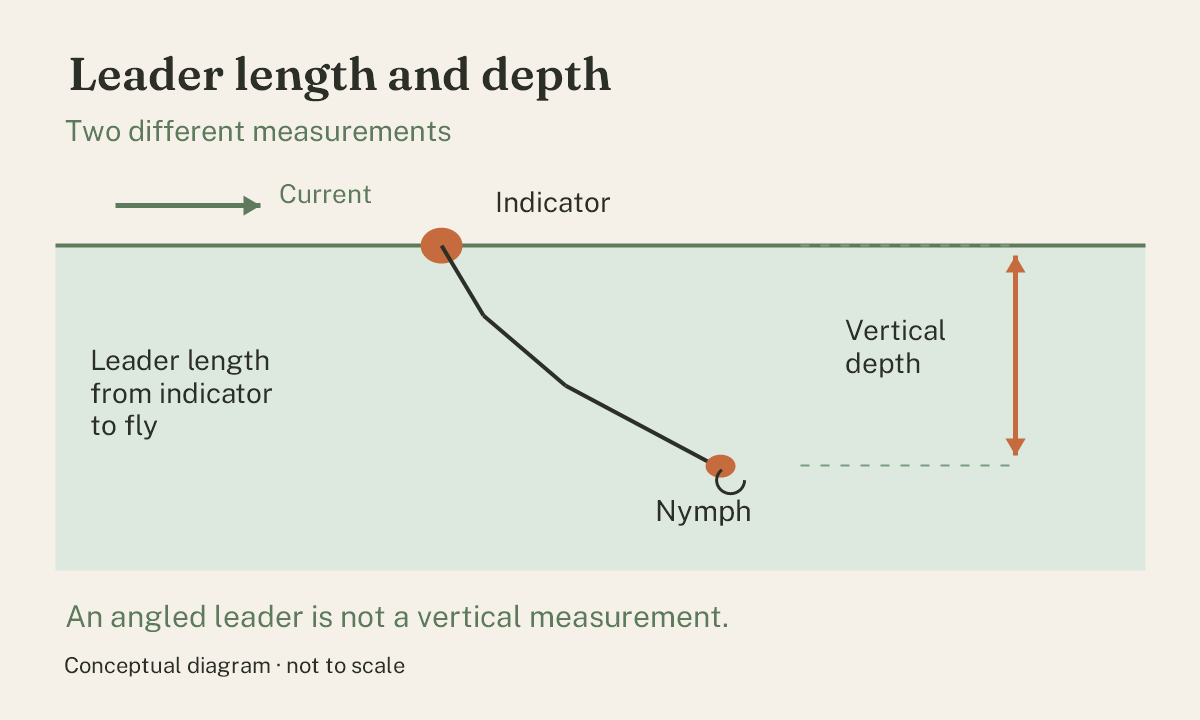
Longueur de fil et profondeur : deux mesures différentes
La distance entre l’indicateur et la mouche correspond à une longueur de fil, pas à une profondeur garantie. Dans le courant, ce fil se courbe ou s’incline. Une longueur de 1,20 m (environ 4 pieds) ne signifie donc pas que la nymphe se trouve exactement à cette profondeur sous la surface.
Pour chercher près du fond, certains guides proposent comme point de départ une distance indicateur–mouche supérieure à la profondeur estimée, parfois autour d’une fois et demie. Ce repère n’est pas une formule à appliquer partout : vitesse du courant, poids, diamètre du fil et trajet de la ligne modifient le résultat. Dans une eau peu profonde et lente, il peut déjà laisser trop de longueur.
Trois réglages à essayer dans un ordre simple
1. Donner à la nymphe le temps de descendre
Si vous lancez exactement à hauteur du poste, la nymphe peut le traverser avant d’avoir atteint la profondeur souhaitée. Faites-la entrer un peu plus en amont, c’est-à-dire du côté d’où vient le courant. Gardez une distance courte que vous contrôlez bien, puis observez son passage dans la même petite zone.
Ne tirez pas aussitôt la ligne pour la tendre. Retirez seulement les grands paquets de soie qui vous empêcheraient de réagir. Une traction trop forte peut faire remonter la mouche. Pour corriger la ligne sans déplacer inutilement la nymphe, retrouvez les réglages d’une dérive naturelle.
2. Ajuster la distance entre l’indicateur et la mouche
Si la longueur paraît insuffisante, déplacez l’indicateur vers la canne pour laisser davantage de fil sous lui, dans les limites du bas de ligne et de son système de fixation. Pour réduire cette longueur, rapprochez-le de la mouche. Faites un petit changement, puis recommencez au même endroit.
Exemple d’exercice : une modification de 10 à 20 cm (environ 4 à 8 pouces) est facile à noter et à comparer. Ce n’est pas une valeur obligatoire ni une promesse d’efficacité. Si un nœud empêche de déplacer l’indicateur, adaptez proprement le montage; ne forcez pas sur le fil.
3. Modifier le poids seulement si nécessaire
Une longueur suffisante ne sert pas beaucoup si le courant emporte une mouche trop légère avant qu’elle descende. Essayez alors une nymphe un peu plus lourde, de taille et de silhouette proches, ou un petit poids supplémentaire lorsque les règles locales le permettent. Gardez le reste du montage identique.
Si la mouche accroche continuellement, revenez vers moins de poids ou une longueur plus courte. Ne cherchez pas à sentir le fond à chaque seconde. Vérifiez aussi que vous ne présentez pas toujours la mouche dans une fissure entre deux pierres.
Ce que les signes vous disent — et ce qu’ils ne disent pas
| Ce que vous observez | Une piste à vérifier | Un premier essai |
|---|---|---|
| Aucun contact ni réaction | La mouche passe peut-être trop haut; le poisson peut aussi être absent ou peu actif. | Donner davantage de temps de descente, puis comparer. |
| Arrêts au même endroit à chaque passage | Une pierre, une branche ou une zone de fond irrégulier. | Décaler légèrement le trajet avant d’alourdir. |
| Accrochages répétés | Montage trop profond ou trop lourd pour ce trajet. | Réduire une seule variable : longueur ou poids. |
| Indicateur qui plonge ou se décale soudainement | Poisson, fond ou traction de la ligne : le signe seul ne tranche pas. | Récupérer le mou et relever doucement la canne pour mettre le fil en tension. |
| Nymphe qui remonte en fin de passage | La ligne se tend lorsque la mouche passe en aval. | Évaluer la profondeur pendant le passage utile, avant cette remontée. |
Pour réagir à un mouvement suspect, faites un geste mesuré. Si un poisson mord à la mouche, cette mise en tension aide à fixer l’hameçon. Si le montage reste bloqué, ne continuez pas à tirer violemment avec la canne courbée; une forte tension peut ramener l’hameçon vers vous.
Un exercice pour apprendre sans tout changer
Choisissez un petit secteur autorisé, sans courant dangereux, que vous pouvez pêcher depuis un appui stable. Gardez la même mouche et le même trajet au départ.
- Observez quelques passages : notez où l’indicateur ralentit, s’arrête ou plonge.
- Changez un seul réglage : temps de descente, longueur sous l’indicateur ou poids.
- Recommencez dans le même secteur : comparez les accrochages et les réactions, pas seulement le nombre de poissons.
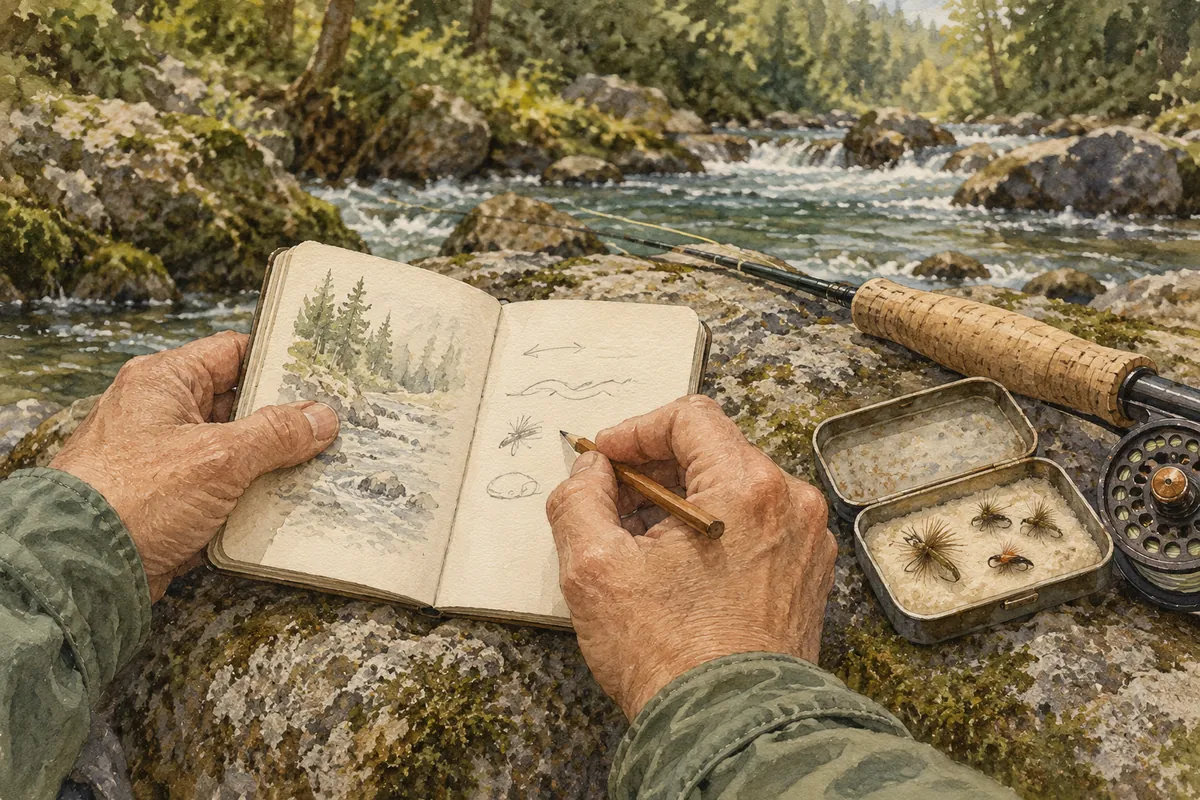
- Notez le résultat : écrivez ce que vous avez modifié et ce qui a changé.
Une observation utile peut être aussi simple que « moins d’accrochages après avoir raccourci le fil ». Vous apprenez à contrôler le montage même sans capture. Si aucun changement n’aide, essayez un autre petit secteur avant de multiplier les poids.
Adapter la méthode au lieu et à la saison
En lac, il n’y a pas le même courant pour déplacer le montage : la profondeur sous l’indicateur et l’effet du vent se travaillent autrement. Ce guide porte sur une première méthode en rivière, pas sur un montage unique pour tous les milieux.
En octobre, les eaux nord-américaines et européennes peuvent refroidir, tandis que le printemps avance en Australie et en Amérique du Sud. Partez des conditions du jour plutôt que d’une recette liée au calendrier. Vérifiez les périodes d’ouverture, les montages autorisés et les restrictions concernant les poids; évitez les zones où les poissons se reproduisent. N’entrez pas dans une eau profonde pour atteindre un poste.
Useful sources
- Orvis — What Is Nymph Fishing? : indicateur, poids et réglage progressif.
- Orvis — How to Fish Deep Nymphs : démonstration de pêche sous la surface.
- Granite Bay Flycasters — Rigging for Nymph Fishing : lien entre profondeur, courant et montage.
Conclusion : cherchez une profondeur, puis vérifiez-la
Une nymphe bien présentée n’est ni condamnée à rester en surface ni obligée de racler le fond. Son poids, la longueur disponible et le temps de descente doivent travailler ensemble. Choisissez une petite zone et observez avant d’ajouter du matériel.
À votre prochaine sortie, gardez la même mouche pendant quelques passages. Modifiez un seul réglage et notez son effet. Vous aurez un repère concret pour comprendre ce que fait votre nymphe sous l’eau.
Your nymph passes through promising water without a response. After an adjustment, it catches the bottom on every drift. Between those two results lies a more useful question than “Which fly should I try next?”: how deep is your fly actually travelling?
A nymph is an artificial fly that commonly imitates an immature aquatic insect living underwater. A suitable pattern can still pass above the fish. A rig that is too heavy may instead lodge between stones. To improve, choose a depth that makes sense for the water, then test your estimate with a few comparable drifts.
The right depth is not always the bottom
A trout may feed near the bottom, at mid-depth or just below the surface. The target is the depth of the fish and its food, not automatically the deepest point. If you see fish moving below the surface, fishing very deep may put your fly beneath them.
When nothing is visible, an accessible area of moderate depth makes a useful practice spot. Look for a current edge or a small run, where water moves fairly steadily. To choose that area, revisit the guide to reading water and choosing where to cast. Here, we will focus on what happens below the surface.
Start with a rig you understand
For this river exercise, use a floating fly line, a suitable leader and one nymph. The leader connects the thick fly line to the fly; its finer end section is the tippet. One fly makes the rig easier to understand and reduces tangles.
If the method is permitted, add a strike indicator: a small floating marker attached to the leader. Watch it for a stop or a change of direction. It may signal a fish biting the fly, but it can also react when the rig touches a stone. It does not show you the nymph’s exact position.
Weight that helps the fly sink may come from a metal bead built into the nymph or a small weight attached to the leader. Begin with a bead-head nymph your rod can cast comfortably. The indicator needs enough buoyancy to support the rig rather than constantly sinking under its weight. For connections, see the guide to leaders, tippet and knots.
Leader length and depth are different measurements
The distance between the indicator and the fly is a length of leader, not a guaranteed depth. Current makes the leader curve or angle away from vertical. A 1.20 m length (about 4 feet) does not mean the nymph is exactly that deep below the surface.
When searching near the bottom, some guides suggest starting with an indicator-to-fly distance greater than the estimated water depth, sometimes about one and a half times that depth. This is a starting point rather than a universal formula: current speed, weight, leader diameter and line position change the result. In shallow, slow water, that distance may already be too long.
Three adjustments to try in a simple order
1. Give the nymph time to sink
If the fly lands level with the fish’s likely holding spot, it may pass through before reaching the desired depth. Place it a little farther upstream, towards the direction the current comes from. Keep the cast short enough to control and watch it travel through the same small area.
Do not immediately pull everything tight. Gather only the large piles of loose line that would delay your response. Too much tension can lift the fly. To adjust the line without unnecessarily moving the nymph, revisit the guide to a natural drift.
2. Adjust the indicator-to-fly distance
If the distance seems insufficient, move the indicator towards the rod to leave more leader below it, within the limits of your leader and the indicator’s attachment system. To reduce the distance, move it towards the fly. Make a small change, then fish the same area again.
Practice example: an adjustment of 10 to 20 cm (about 4 to 8 inches) is easy to record and compare. It is neither a required amount nor a guarantee. If a knot prevents the indicator from moving, alter the rig properly rather than forcing it along the leader.
3. Change the weight only when needed
Extra leader length is of limited use if current carries a light fly past the target before it sinks. Try a slightly heavier nymph with a similar size and profile, or a small additional weight where local rules allow it. Keep the rest of the setup unchanged.
If the fly keeps catching the bottom, return to less weight or a shorter indicator-to-fly distance. Do not try to feel the bottom continuously. Also check whether you are repeatedly sending the fly into the same gap between stones.
What the signs suggest — and what they cannot prove
| What you notice | One possibility to check | A first adjustment |
|---|---|---|
| No contact or response | The fly may be too high; fish may also be absent or inactive. | Allow more sinking time, then compare. |
| Stops at the same point every time | A stone, branch or uneven bottom. | Shift the path slightly before adding weight. |
| Repeated snags | A rig too deep or heavy for that path. | Reduce one variable: distance or weight. |
| Indicator suddenly dives or moves sideways | A fish, bottom contact or line tension; the sign alone cannot decide. | Gather slack and gently raise the rod to tighten the leader. |
| Nymph rises at the end of the drift | The line tightens as the fly moves downstream of you. | Assess depth during the useful drift, before that rise. |
Respond to an unexpected movement with a measured action. If a fish bites the fly, tightening the line helps set the hook. If the rig remains stuck, avoid continuing to pull hard with a deeply bent rod; sudden release under tension can send the hook towards you.
A practice session without changing everything
Choose a small, permitted area without dangerous current, where you can fish from firm footing. Begin with the same fly and path.
- Watch a few drifts: note where the indicator slows, stops or dives.
- Change one setting: sinking time, distance below the indicator or weight.
- Repeat in the same area: compare snags and responses, not only fish caught.
- Record the result: write down what you changed and what happened.
A useful observation might be “fewer snags after shortening the leader below the indicator”. You are learning to control the rig even without a catch. If no adjustment helps, try another small area before adding more weight.
Adapt the method to the place and season
A lake lacks the same river current: depth below the indicator and the effect of wind need a different approach. This guide offers a starting method for rivers, not one rig for every environment.
October may bring cooling water in North America and Europe while spring advances in Australia and South America. Start with today’s conditions rather than a calendar-based recipe. Check open seasons, permitted rigs and restrictions on added weight; avoid areas where fish are spawning. Do not enter deep water simply to reach a holding spot.
Useful sources
- Orvis — What Is Nymph Fishing?: indicators, weight and progressive adjustments.
- Orvis — How to Fish Deep Nymphs: an underwater fishing demonstration.
- Granite Bay Flycasters — Rigging for Nymph Fishing: depth, current and rigging.
Conclusion: choose a depth, then test it
A well-presented nymph need not stay near the surface or scrape along the bottom. Its weight, available leader length and sinking time work together. Choose a small area and observe before adding equipment.
On your next outing, keep the same fly for a few drifts. Change one setting and record its effect. You will have a practical clue to what your nymph is doing underwater.