La pêche à la mouche en eau trouble demande surtout de rendre chaque passage plus facile à repérer. Quand une pluie colore la rivière, la première réaction consiste souvent à changer de mouche plusieurs fois. Pourtant, le lieu, la profondeur et la dérive comptent autant que la couleur.

Une eau brune n’est pas toujours complètement opaque. Des matières végétales peuvent lui donner une teinte de thé, tandis que des particules en suspension réduisent la transparence. Avant de pêcher, regardez à quelle distance vous distinguez une pierre, le bout de votre chaussure dans l’eau ou votre mouche près de la rive, sans vous pencher au-dessus d’un bord instable.
Comprendre ce que l’eau trouble change
La turbidité décrit la perte de transparence causée par des particules ou d’autres matières qui diffusent la lumière. Plus l’eau devient trouble, moins la lumière pénètre. Pour le pêcheur, cela signifie simplement qu’une mouche peut devenir plus difficile à repérer lorsqu’elle passe trop loin d’un poisson.
Cela ne veut pas dire que les truites cessent automatiquement de se nourrir. Elles peuvent se déplacer vers des secteurs où elles dépensent moins d’énergie et où la nourriture arrive à leur portée. Votre objectif n’est donc pas de couvrir toute la rivière. Il consiste à réduire la distance entre la mouche et une tenue probable.
Pêche à la mouche en eau trouble : lire l’endroit avant d’ouvrir sa boîte
Une eau colorée après la pluie s’accompagne parfois d’un débit plus fort. Observez d’abord la rivière depuis la berge. Cherchez les zones où le courant ralentit : bordures, intérieur d’un virage, aval d’un gros rocher, entrée d’un bras secondaire ou limite entre un courant rapide et une veine plus calme.
Les truites peuvent utiliser ces abris pour éviter le courant principal. Une petite zone bien explorée vaut mieux qu’une suite de longs lancers au hasard. Commencez près de vous, puis allongez progressivement si l’accès reste sûr. Vous éviterez aussi de marcher dans une bordure qui pouvait abriter un poisson.
Distinguer couleur et véritable turbidité
Une eau ambrée peut encore laisser voir les formes. À l’inverse, une eau chargée de limon peut masquer rapidement une pierre claire. Observez la transparence réelle, pas seulement la couleur générale. Cette différence vous aide à décider si une imitation discrète reste visible ou s’il faut essayer un profil plus marqué.

Choisir une mouche en eau trouble
Pour commencer, ne changez pas simultanément la taille, la couleur, le poids et la technique. Choisissez une mouche que vous savez lancer et suivre, puis modifiez un seul élément. En pêche à la mouche en eau trouble, trois familles offrent des points de départ faciles à comparer.
1. Une nymphe sombre et dense
Une nymphe imite une forme immature d’insecte sous l’eau. Un modèle brun foncé, noir ou olive, avec une silhouette assez nette, constitue un premier essai simple. Une petite bille métallique peut ajouter du poids pour atteindre la profondeur voulue. Le lest désigne ce poids qui aide la mouche à descendre; il faut l’ajuster pour toucher la zone visée sans accrocher constamment le fond.
2. Une imitation plus visible
Une touche de rose, d’orange ou de vert jaune peut aider le pêcheur à comparer une option plus visible. Ce n’est pas une règle universelle. Utilisez la même zone et une profondeur semblable, puis observez si les contacts deviennent plus fréquents. Une couleur vive ne compense pas une mouche qui passe trop haut ou trop loin du poisson.
3. Un streamer au profil marqué
Un streamer imite notamment un petit poisson ou une autre proie mobile. Un modèle sombre, olive ou noir, dont les fibres bougent sans exiger une récupération rapide, peut produire une silhouette distincte. Présentez-le près d’une bordure calme ou d’un obstacle accessible et gardez la ligne sous contrôle. Une animation sobre suffit souvent pour un premier passage.
Régler la profondeur avant de changer encore de mouche
Une mouche bien choisie reste peu utile si elle passe au-dessus de la tenue. Avec une nymphe, ajustez progressivement la profondeur sous l’indicateur ou la longueur de ligne contrôlée. Avec un streamer, changez l’angle du lancer ou laissez-le descendre un peu plus longtemps avant de l’animer. Faites de petites corrections et surveillez les accrochages au fond.
Le contact avec le fond n’est pas le but à chaque dérive. Vous cherchez une présentation assez profonde pour passer près du poisson tout en restant contrôlable. Si la mouche s’accroche à chaque lancer, réduisez légèrement le lest ou la profondeur. Si rien n’indique qu’elle descend, ajoutez un petit ajustement plutôt que de tout remplacer.
Pêche à la mouche en eau trouble : garder une dérive lisible
Une dérive naturelle signifie que la mouche suit le courant sans être tirée anormalement par la ligne. Pour la conserver, rapprochez vos lancers et gardez le bout de la canne orienté vers la zone pêchée. Replacez une partie de la ligne sur l’eau lorsque le courant l’emporte plus vite que la mouche. Ce geste corrige la ligne sans arracher immédiatement la mouche de sa trajectoire.
Dans une eau colorée, des dérives plus courtes facilitent le contrôle. Elles vous permettent aussi de répéter le passage autour d’une pierre ou le long d’une bordure. Quand l’indicateur s’arrête, ralentit ou se déplace de côté, tendez la ligne d’un geste maîtrisé pour fixer l’hameçon. Le contact peut être discret même avec une mouche plus visible.
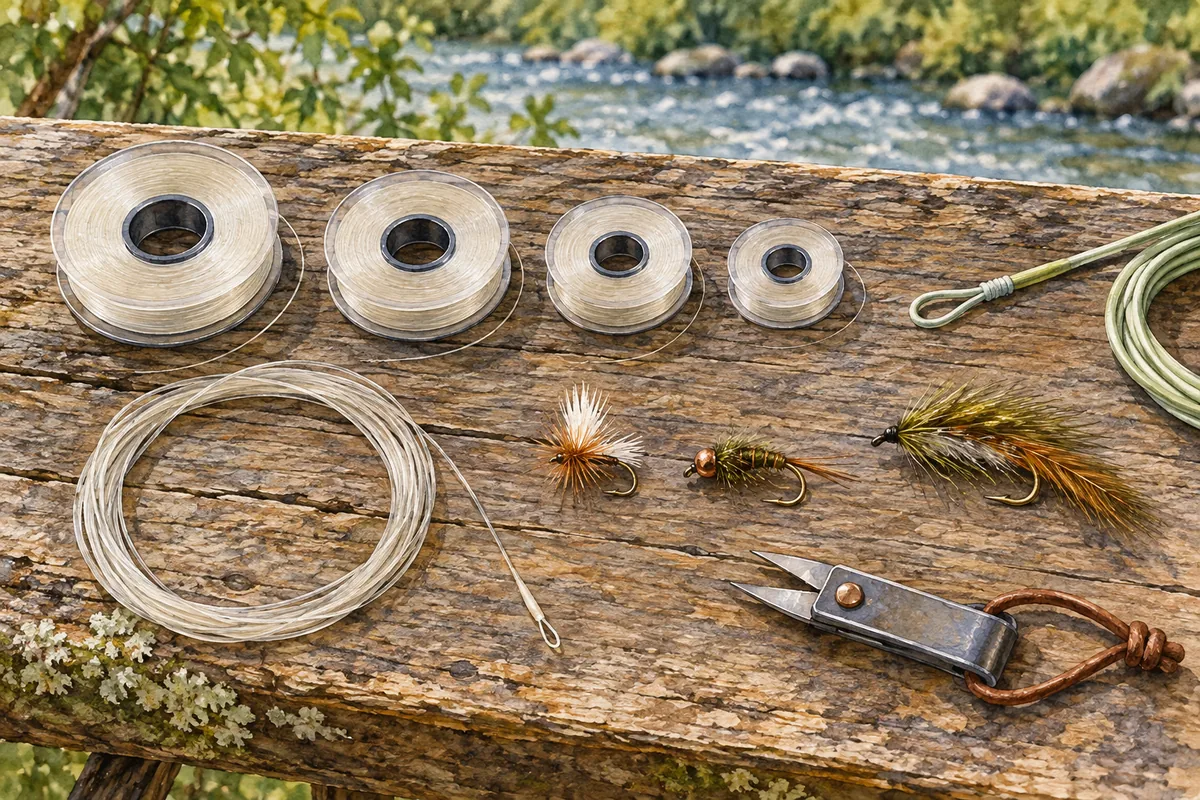
Ce que j’observe, ce que j’essaie
| Ce que j’observe | Ce que j’essaie | Ce que je garde en tête |
|---|---|---|
| Eau légèrement teintée, niveau stable | Une nymphe familière, puis une option un peu plus sombre ou visible | Garder la même profondeur pour comparer. |
| Eau trouble, courant plus fort | Une bordure calme ou l’aval d’un obstacle | Raccourcir la dérive et contrôler la ligne. |
| Contacts près du fond | Conserver la zone et la profondeur | Ne pas changer de modèle trop vite. |
| Aucune réaction | Revoir la tenue probable et la profondeur | Modifier ensuite un seul élément. |
| Eau très opaque ou débit dangereux | Choisir un autre secteur ou une autre journée | La sécurité décide avant la pêche. |
Une méthode simple en cinq passages
- Choisissez une bordure ou un abri que vous pouvez atteindre sans risque.
- Faites deux ou trois dérives courtes avec une nymphe connue.
- Ajustez légèrement la profondeur si la mouche passe manifestement trop haut ou s’accroche sans cesse.
- Comparez ensuite une mouche plus sombre, plus visible ou au profil un peu plus grand, sans changer votre zone.
- Notez les contacts, la profondeur approximative et la transparence observée.
Cette méthode ne prétend pas trouver une combinaison parfaite. Elle vous aide à savoir ce que vous avez réellement comparé. En pêche à la mouche en eau trouble, cette discipline évite de changer toute la boîte sans apprendre de chaque passage.
Après la pluie, la sécurité décide avant la pêche
Une rivière trouble peut monter rapidement, transporter des branches et rendre une berge glissante. Vérifiez les conditions locales et les règlements applicables avant de partir. Si le courant vous empêche de garder un appui stable, restez sur la rive. Une veste de flottaison individuelle peut être judicieuse près d’une eau forte, mais elle ne rend pas une traversée dangereuse acceptable.
N’entrez jamais dans une eau dont vous ne distinguez plus le fond lorsque vous ne connaissez pas parfaitement le passage. Les obstacles peuvent avoir bougé depuis votre dernière sortie. Une bonne décision consiste parfois à observer la rivière, prendre quelques notes et revenir lorsque le niveau baisse.
Useful sources
- U.S. Geological Survey — Turbidity and Water
- Orvis Learning Center — Spotting Trout in Dirty Water
- Orvis News — 5 Secrets to Nymphing in Off-Color Water
- Orvis News — How to Fish During Runoff in the Rockies
Conclusion : rapprocher la mouche du poisson
La pêche à la mouche en eau trouble devient plus claire lorsque vous gardez le bon ordre : sécurité, tenue probable, profondeur, dérive, puis contraste de la mouche. Cherchez les zones calmes, faites des passages courts et modifiez un seul élément à la fois.
Quelle bordure ou quel abri pourriez-vous explorer en premier lors de votre prochaine sortie après une pluie ?
Fly fishing in murky water is mainly about making each presentation easier for a fish to detect. After rain colours a river, the first impulse is often to change flies repeatedly. Yet location, depth and drift matter just as much as colour.
Brown water is not always completely opaque. Dissolved plant matter can give it a tea-like colour, while suspended particles reduce clarity. Before fishing, see how far away you can still distinguish a stone, the end of your boot in the water or your fly near the bank. Do this from a stable position without leaning over an unsafe edge.
Understand What Murky Water Changes
Turbidity describes a loss of clarity caused by particles or other matter that scatter light. As water becomes more turbid, less light penetrates it. For an angler, the practical result is simple: a fly may be harder to detect when it passes too far from a fish.
This does not mean trout automatically stop feeding. They may move into places where they spend less energy and where food comes within reach. Your goal is therefore not to cover the entire river. It is to reduce the distance between your fly and a likely holding area.
Fly Fishing in Murky Water: Read the River Before Opening Your Fly Box
Coloured water after rain sometimes comes with stronger flow. Observe the river from the bank first. Look for places where the current slows: edges, the inside of a bend, the downstream side of a large boulder, the entrance to a side channel or the seam between fast and softer water.
Trout may use these shelters to avoid the main current. One small area covered carefully is more useful than a series of long, random casts. Start close and lengthen your casts gradually when access remains safe. This also keeps you from stepping into bank water that may hold a fish.
Distinguish Colour from True Turbidity
Amber water may still reveal shapes. Water carrying silt can hide a pale stone quickly. Judge actual clarity rather than the general colour alone. That difference helps you decide whether a subtle imitation remains visible or whether it is time to compare a stronger profile.
Choose a Fly for Murky Water
Do not change size, colour, weight and technique all at once. Begin with a fly you can cast and track confidently, then alter one element. When fly fishing in murky water, three basic options are easy to compare.
1. A Dark, Dense Nymph
A nymph imitates an immature insect below the surface. A dark brown, black or olive pattern with a clear profile is a practical first choice. A small metal bead can add weight and help the fly reach the intended depth. Weight is what helps the fly sink; adjust it so the fly reaches the target zone without snagging the bottom constantly.
2. A More Visible Imitation
A touch of pink, orange or yellow-green gives you a more visible option to compare. It is not a universal rule. Fish the same area at a similar depth and watch whether contacts become more frequent. A bright colour cannot make up for a fly that passes too high or too far from the fish.
3. A Streamer with a Clear Profile
A streamer can imitate a small fish or another moving prey item. A dark olive or black pattern whose fibres move without requiring a fast retrieve may create a distinct silhouette. Present it near soft bank water or an accessible obstruction and keep control of the line. A restrained retrieve is enough for the first pass.
Set Depth Before Changing Flies Again
A well-chosen fly is of little use if it travels above the holding depth. With a nymph, adjust the depth below the indicator or the length of line you control. With a streamer, change your casting angle or let it sink slightly longer before retrieving it. Make small changes and watch for repeated contact with the bottom.
Touching bottom is not the goal on every drift. You want a presentation deep enough to pass near a fish while remaining manageable. If the fly snags every cast, reduce the weight or depth slightly. If nothing suggests it is sinking, make one small adjustment instead of replacing everything.
Fly Fishing in Murky Water: Keep the Drift Easy to Read
A natural drift means the fly follows the current without being pulled unnaturally by the line. Keep casts closer and point the rod tip toward the water you are fishing. Reposition part of the line on the surface when a faster current begins to pull it ahead of the fly. This adjustment corrects the line without immediately dragging the fly away from its path.
Shorter drifts are easier to control in coloured water. They also let you repeat a pass around a rock or along a bank. When the indicator stops, slows or moves sideways, tighten the line with a controlled motion so the hook can take hold. The contact may be subtle even when the fly is more visible.
What I See and What I Try
| What I see | What I try | What I keep in mind |
|---|---|---|
| Slightly stained water, stable level | A familiar nymph, then a darker or more visible option | Keep depth similar for comparison. |
| Murky water, stronger flow | Soft bank water or the downstream side of cover | Shorten the drift and control the line. |
| Contacts near the bottom | Keep the location and depth | Do not change patterns too quickly. |
| No response | Recheck likely holding water and depth | Then change one element. |
| Very opaque water or dangerous flow | Choose another reach or another day | Safety comes before fishing. |
A Simple Five-Pass Method
- Choose soft water or cover that you can reach safely.
- Make two or three short drifts with a familiar nymph.
- Adjust depth slightly if the fly is clearly too high or snagging continually.
- Compare a darker, more visible or slightly larger-profile fly without changing the area.
- Record contacts, approximate depth and the clarity you observed.
This method does not promise a perfect combination. It helps you understand what you actually compared. When fly fishing in murky water, this discipline keeps you from cycling through the whole fly box without learning from each pass.
After Rain, Safety Comes Before Fishing
A murky river can rise quickly, carry branches and make banks slippery. Check local conditions and applicable regulations before leaving. If the current prevents you from keeping stable footing, remain on the bank. A personal flotation device may be sensible near strong water, but it does not make an unsafe crossing acceptable.
Do not enter water where you cannot see the bottom if you do not know the crossing extremely well. Obstacles may have shifted since your last visit. Sometimes the best decision is to observe the river, take a few notes and return after the level falls.
Useful Sources
- U.S. Geological Survey — Turbidity and Water
- Orvis Learning Center — Spotting Trout in Dirty Water
- Orvis News — 5 Secrets to Nymphing in Off-Color Water
- Orvis News — How to Fish During Runoff in the Rockies
Conclusion: Bring the Fly Closer to the Fish
Fly fishing in murky water becomes easier to understand when you keep the decisions in order: safety, likely holding water, depth, drift and finally fly contrast. Search soft water, make short presentations and alter one element at a time.
Which bank edge or sheltered pocket would you explore first on your next outing after rain?
Keep exploring this world

Trout Coming Unhooked: How to Adjust Your Hook Set and Stay Connected
A trout takes your fly, the rod bends and then everything goes light. Learn to identify when contact was lost, adjust your hook set…
Read the article
Fly Fishing in the Wind: How to Cast Without Forcing or Tangling
Your fly blows back toward you, the line drifts sideways and the leader lands in a heap. Learn how safer positioning and shorter casts…
Read the article
Autumn Fishing: Where to Look for Fish as the Water Cools
Your summer spot has gone quiet? Learn five clues to help you choose where to fish as the water cools and explore the area…
Read the article