The parasite often called the poultry red mite is not a louse. It is a tiny blood-feeding mite that visits chickens mainly while they sleep, then hides during the day in cracks, under roosts, behind nest boxes and between pieces of wood.
That behavior explains why you may examine your hens in daylight and find nothing even when the coop is infested. The good news is that a light or moderate infestation can often be managed at home with a thorough routine, ordinary tools and a locally approved poultry product when one is needed.
Do not begin by spraying at random. Confirm that mites are present, then work on the whole coop and flock environment, not only one hen.
Why chicken mites are difficult to see
After a blood meal, a poultry red mite may look reddish brown. Before feeding, it is greyish and resembles a tiny moving speck. It usually stays in the building during the day and reaches sleeping chickens by travelling along the roost.
Its life cycle can be fast. Under favourable conditions, a new generation may develop in about a week, and eggs can survive several treatments. One deep cleaning, even a careful one, may therefore miss newly hatching mites. Reinspection and properly timed follow-up are essential.
Seven warning signs of chicken mites
1. Hens hesitate to enter the coop or use the roost
A hen that is bitten every night may look for another sleeping place. Several birds becoming restless after dark are a good reason to inspect the roost and its brackets.
2. Birds scratch and preen more than usual
Bites irritate the skin and disturb sleep. Feathers may become dull or damaged. Feather loss has other causes, including chicken molting; find actual mites before assuming they are responsible.
3. Combs and wattles look unusually pale
A heavy infestation can cause blood loss and anemia. Compare the bird with her own normal colour rather than with a different breed.
4. Egg production drops without an obvious explanation
Poor sleep, stress and anemia can reduce laying. Mites are only one possible cause. Age, daylight, feed, molt and broodiness are covered in Why Has My Hen Stopped Laying?.
5. Tiny red spots appear on eggs
Blood-fed mites can be crushed inside a nest box and leave small marks. Spotted eggs do not prove an infestation by themselves, but they show you where to inspect first.
6. Grey or red specks move inside cracks
Look under roost ends, around screws, behind nest boxes and inside wooden joints. A flashlight and white paper make moving specks easier to see.
7. Hens lose weight, isolate themselves or become weak
These signs can indicate a severe infestation, but they can also have other causes. A bird that can barely stand, struggles to breathe or has an almost white comb should not wait for a lengthy cleaning project to end.
Confirm the infestation with two low-cost checks
Inspect after dark when the hens are settled. Shine a flashlight beneath the roost, around its brackets and on the skin just above the legs. Wipe the joints with white cloth or paper. Small reddish-brown streaks or moving specks support the diagnosis.
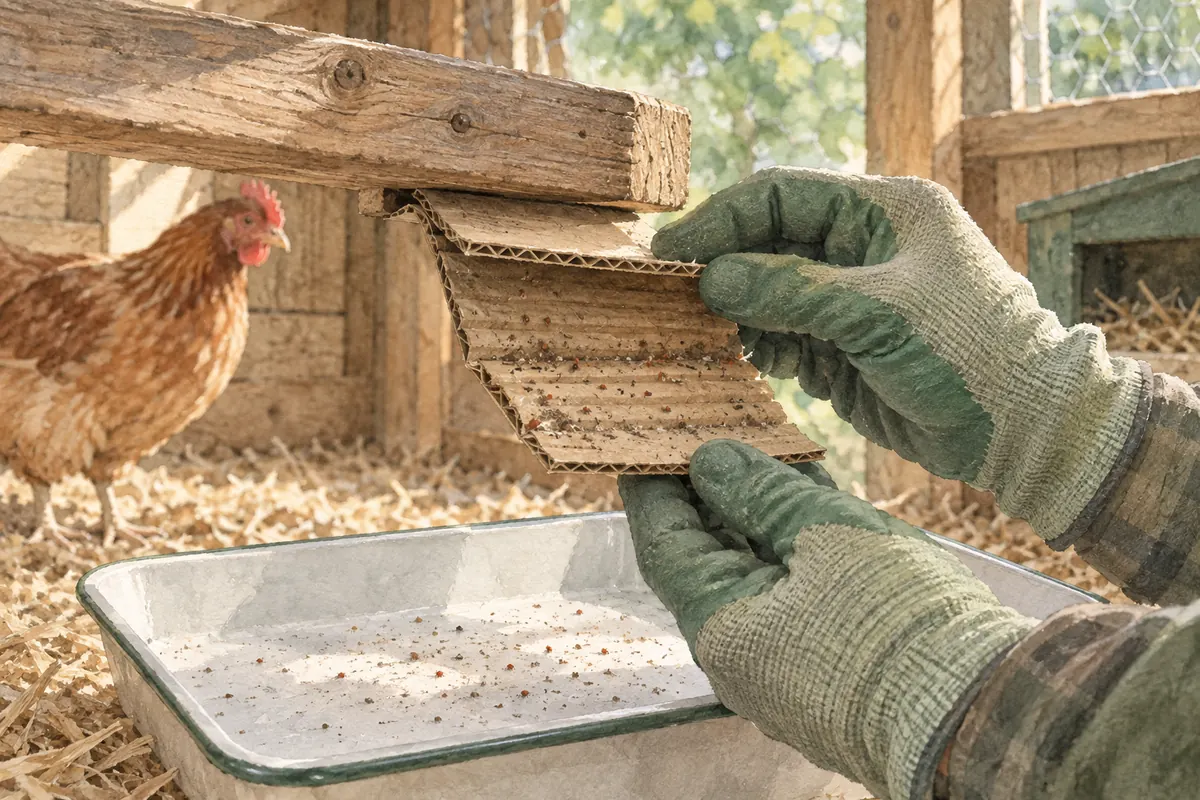
You can also tuck a short folded piece of corrugated cardboard beneath one end of the roost. Mites hide inside the channels. Check it in the morning over a white tray, then seal it in a bag before disposal. This simple trap helps detect and monitor mites; it does not replace cleaning.
A six-step home plan for chicken mites
Step 1 — Move the flock away from the work area
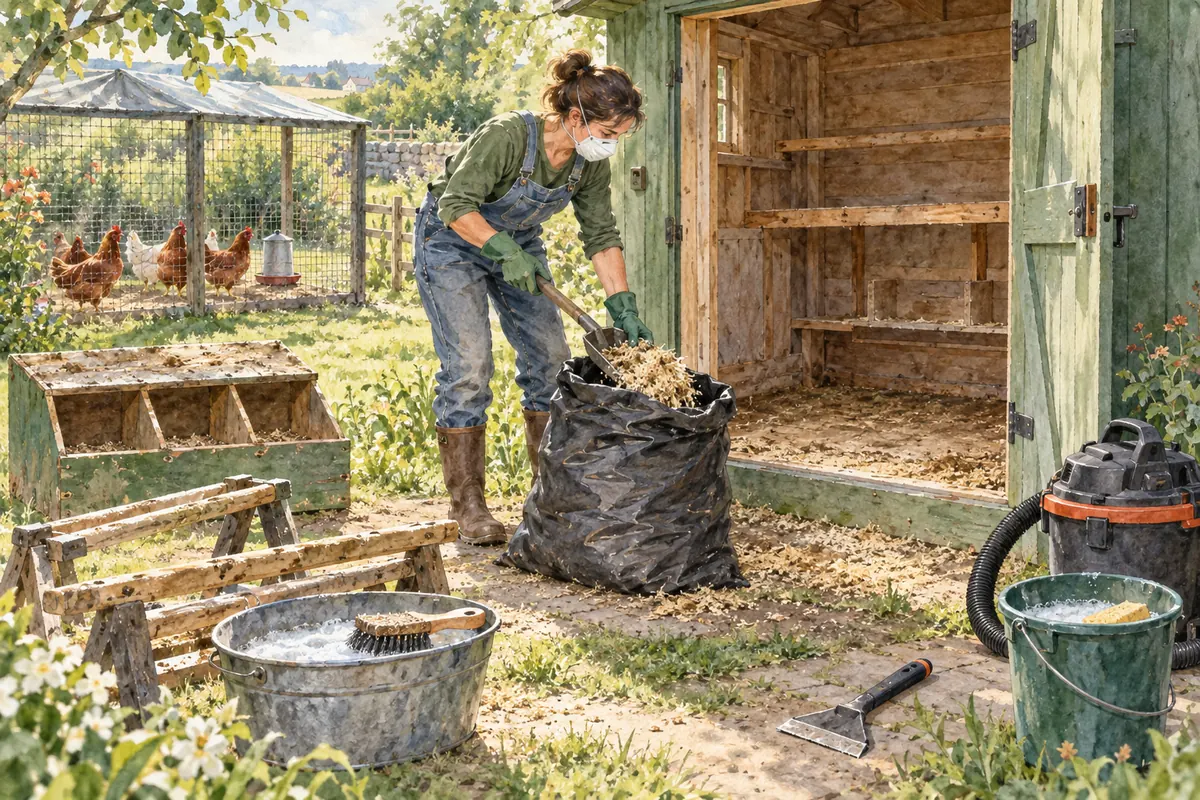
Place all birds in a secure temporary run with shade, clean water and their normal feed. Do not scrape or create dust around the hens. Wear gloves and covering clothing. Use a suitable dust mask when scraping, vacuuming or applying any permitted dust product.
Step 2 — Remove all bedding and nesting material
Put old bedding directly into strong bags and close them before leaving the area. Do not pile it beside the coop or carry it in an open container because mites may return to the birds. Clean removable accessories before putting them back.
Step 3 — Scrape, brush and vacuum hiding places
Remove detachable roosts and nest boxes. Scrape dried manure and debris from screws, brackets, hinges and wooden joints. Use a stiff brush, then a shop vacuum in cracks. Seal the vacuum bag or empty the container into a closed bag away from the coop.
Mechanical cleaning removes many mites and eggs as well as dirt that could prevent a treatment from reaching the hiding places.
Step 4 — Wash, rinse and let the coop dry completely
Wash accessible surfaces with hot soapy water, concentrating beneath roosts and around nest boxes. Washing removes debris and exposed mites, but it does not guarantee that every hidden egg is destroyed. Rinse when needed and allow the building to dry completely before adding clean bedding.
Never mix bleach with another cleaner. Do not use a blowtorch, open flame, kerosene, gasoline or used motor oil in a chicken coop.
Step 5 — Use only a product approved for the intended use
When mites are confirmed, choose a product from a farm cooperative or rural supply store whose label specifically lists laying hens, poultry mites or the poultry house. Check three things before buying it:
- whether it goes on birds, inside an empty coop or only in specific areas;
- whether feed, water, eggs and bedding must be removed;
- whether eggs have a withdrawal period.
Follow the label dose, protective equipment and repeat interval exactly. Rules differ across Canada, the United States, Europe and Australia. A product allowed in one country may not be permitted in another.
Appropriate food-grade diatomaceous earth may sometimes provide support in dry cracks when its label permits that use. Do not create airborne dust, allow people or hens to inhale it, contaminate feed or water, or rely on it instead of cleaning and follow-up. It becomes less effective when damp.
Step 6 — Reinspect and respect the life cycle
Install a clean cardboard monitor and check it regularly. Inspect again about a week later and then weekly for several weeks. If the product label requires another application, follow its interval; the label takes priority over a general schedule.
Improvement means fewer mites in traps, calmer hens at night, normal comb colour and no new spots on eggs. Keep monitoring after adults seem to disappear because hidden eggs may still hatch.
What not to put on chickens
Natural does not automatically mean safe. Avoid concentrated essential oils on skin, random social-media mixtures, household insect sprays, dog or cat flea products and any pesticide whose label does not mention poultry or poultry housing. These products may irritate skin and airways, contaminate eggs or poison birds.
Avoid covering an entire hen with heavy dust. Poultry red mites live mainly in the coop. Filling the air with powder without treating hiding places exposes the birds while leaving the source intact.
Prevent a return without spending much
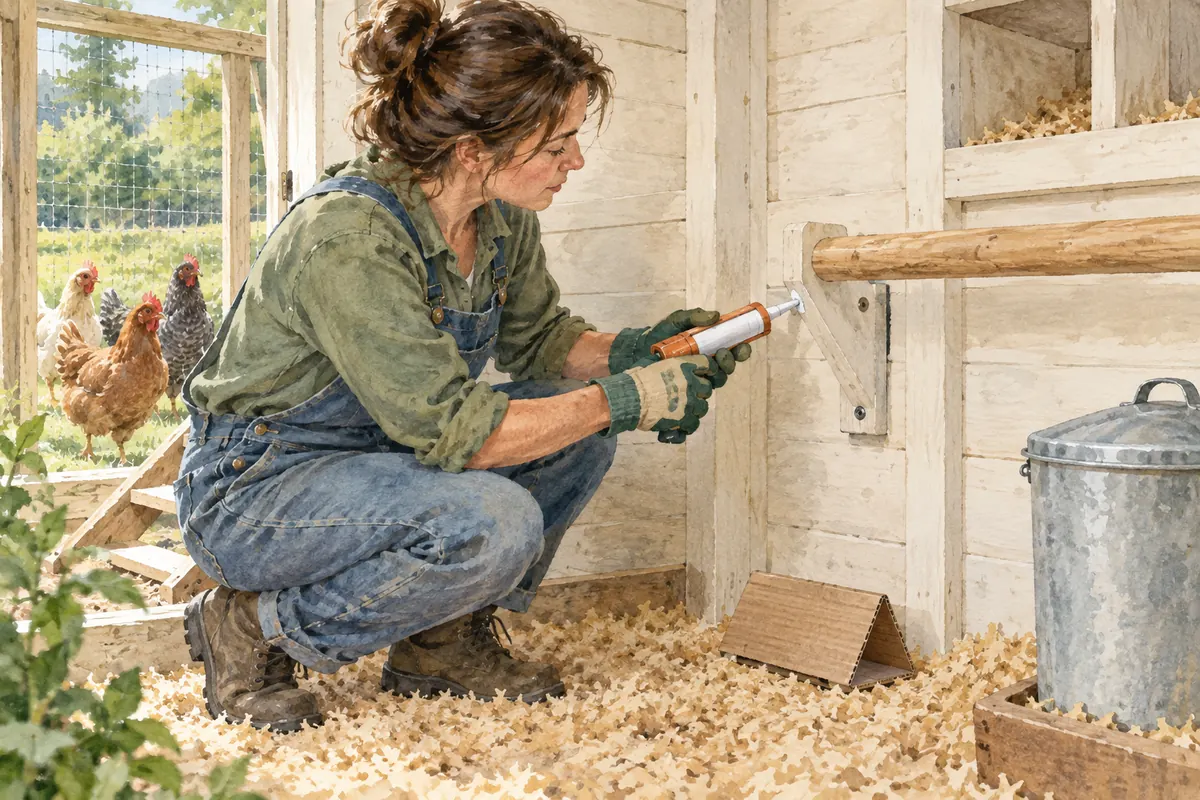
Once the coop is clean and dry, seal large cracks with an appropriate easy-to-clean material. Removable roosts and pale interior surfaces make inspection easier. Keep bedding dry, remove buildup beneath roosts and continue checking simple cardboard monitors.
Exclude wild birds and rodents from feed and housing. Examine new chickens before arrival and keep a true biosecurity separation as described in introducing new chickens gradually. Wash transport crates and second-hand equipment before bringing them near the flock.
When home care is no longer enough
Most of the work can be done at home. Before paying for a consultation, flock owners may also obtain low-cost guidance from a farm cooperative, government agriculture service, extension agent or local poultry association. A clear parasite photo, the product name and the full label make their advice more useful.
Seek prompt qualified help when a hen cannot stand, struggles to breathe, stops drinking, is bleeding, has an almost white comb or when several birds weaken together. Those signs go beyond ordinary coop cleaning. An infestation that returns after two complete, correctly performed cycles also deserves more precise identification. The problem may be another mite, true poultry lice or a different condition.
A complete routine beats a miracle remedy
To control the poultry red mite, remember the sequence: confirm, move the birds, empty, scrape, vacuum, wash, dry, apply an approved product when needed and inspect again. Success rarely comes from one product. It comes from treating every hiding place and following long enough to interrupt the life cycle.
Tonight, look beneath one end of the roost with a flashlight. That is often where the problem first reveals itself.
Keep exploring this world
Why Are My Chickens Pecking Each Other? 8 Causes and an Action Plan to Protect the Victim
Is one hen being chased or losing feathers? Separate normal pecking-order behaviour from harmful pecking and follow a practical plan to protect her.
Read the article
Chicken Water in Winter: How to Keep the Waterer from Freezing
Does your chicken waterer freeze every morning? Compare options with and without electricity, plan water changes and prepare a backup for cold spells.
Read the article
How to Predator Proof a Chicken Coop: 9 Checks Before Dark
Nine practical checks to find weak points, reinforce the run and keep your hens safe before nightfall.
Read the article